Markdown is a great language to write a document, and generate a good looking. But it is unpleasant when you insert a local image into your document. If I share the document including some local images with others, the images will be lost. So I should upload the images to a cloud storage provider at first, and copy back the access url into my document. It's so complicated and repetitive. The real terrible thing is to write a document, I want to insert a image, after I finished these fucking steps, back to the document, I have forgotten what to write.
Alfred is a efficient tool for Mac. There is a great feature call Workflows, we can create a workflow to do the complicated and repetitive work. I'm a heavy user of Alfred, I use it to find files, open apps, translate, calculate and so on. Only you can not think, no you can not do.
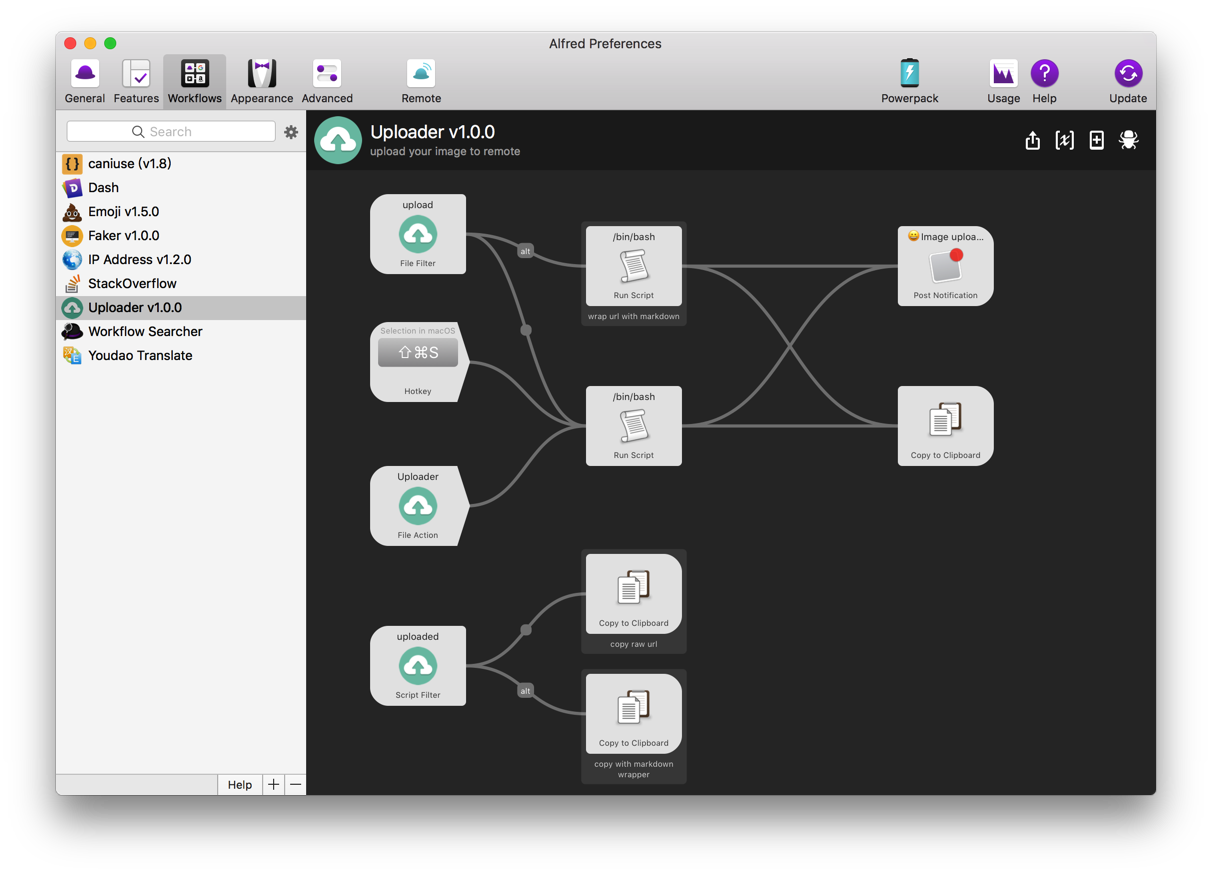
I can not stand to spend a lot of time waiting for the upload and copy again and again. So I create a workflow called Uploader to connect file input, image processing and url output.
With Uploader, if I want to insert a image while writing, use hotkey to open alfred, input "upload" keyword, select the image to upload, continue writing, just keep an eye on the upload success notification, paste the access url, that's all. My focus was always on the document I'm writing, alfred only disturbed for 1 to 3 seconds.
The all images in this document was uploaded by Uploader proudly. Now let me introduce Uploader to you, you can get it from alfred-uploader.
alfred-uploader
An Alfred workflow to help you upload local images to cloud storage provider (just support upyun now), and get back the public access url.
Setup
Download the latest release and double-click the workflow file (with a .alfredworkflow extension). Alfred will install it automatically.
After installed, you can find it in Alfred Preferences -> Workflows list.
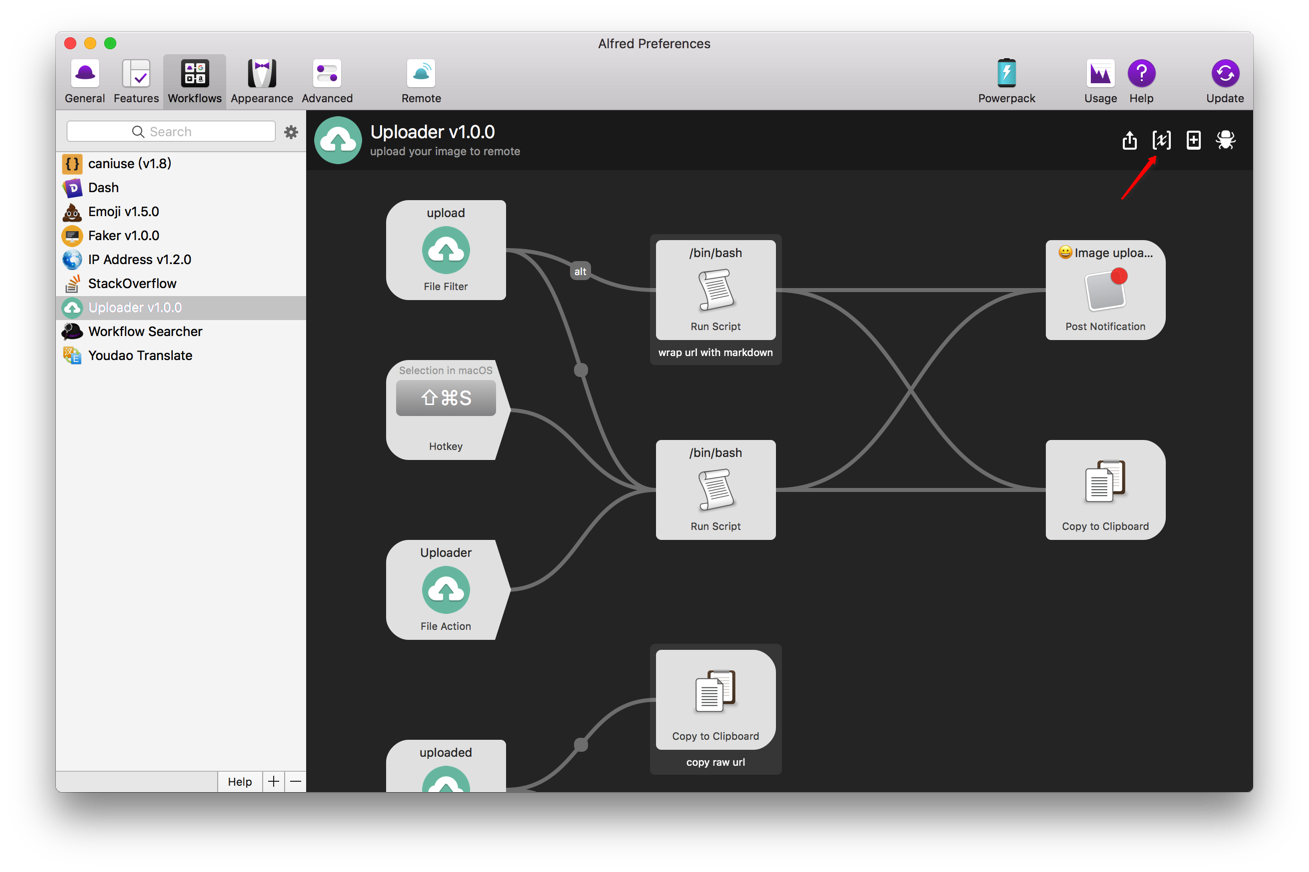
Before we get started, we have to set some variables, click the "[x]" icon button specified with red arrow below.
Fill the variables into the right list on the pop-up modal, then save.
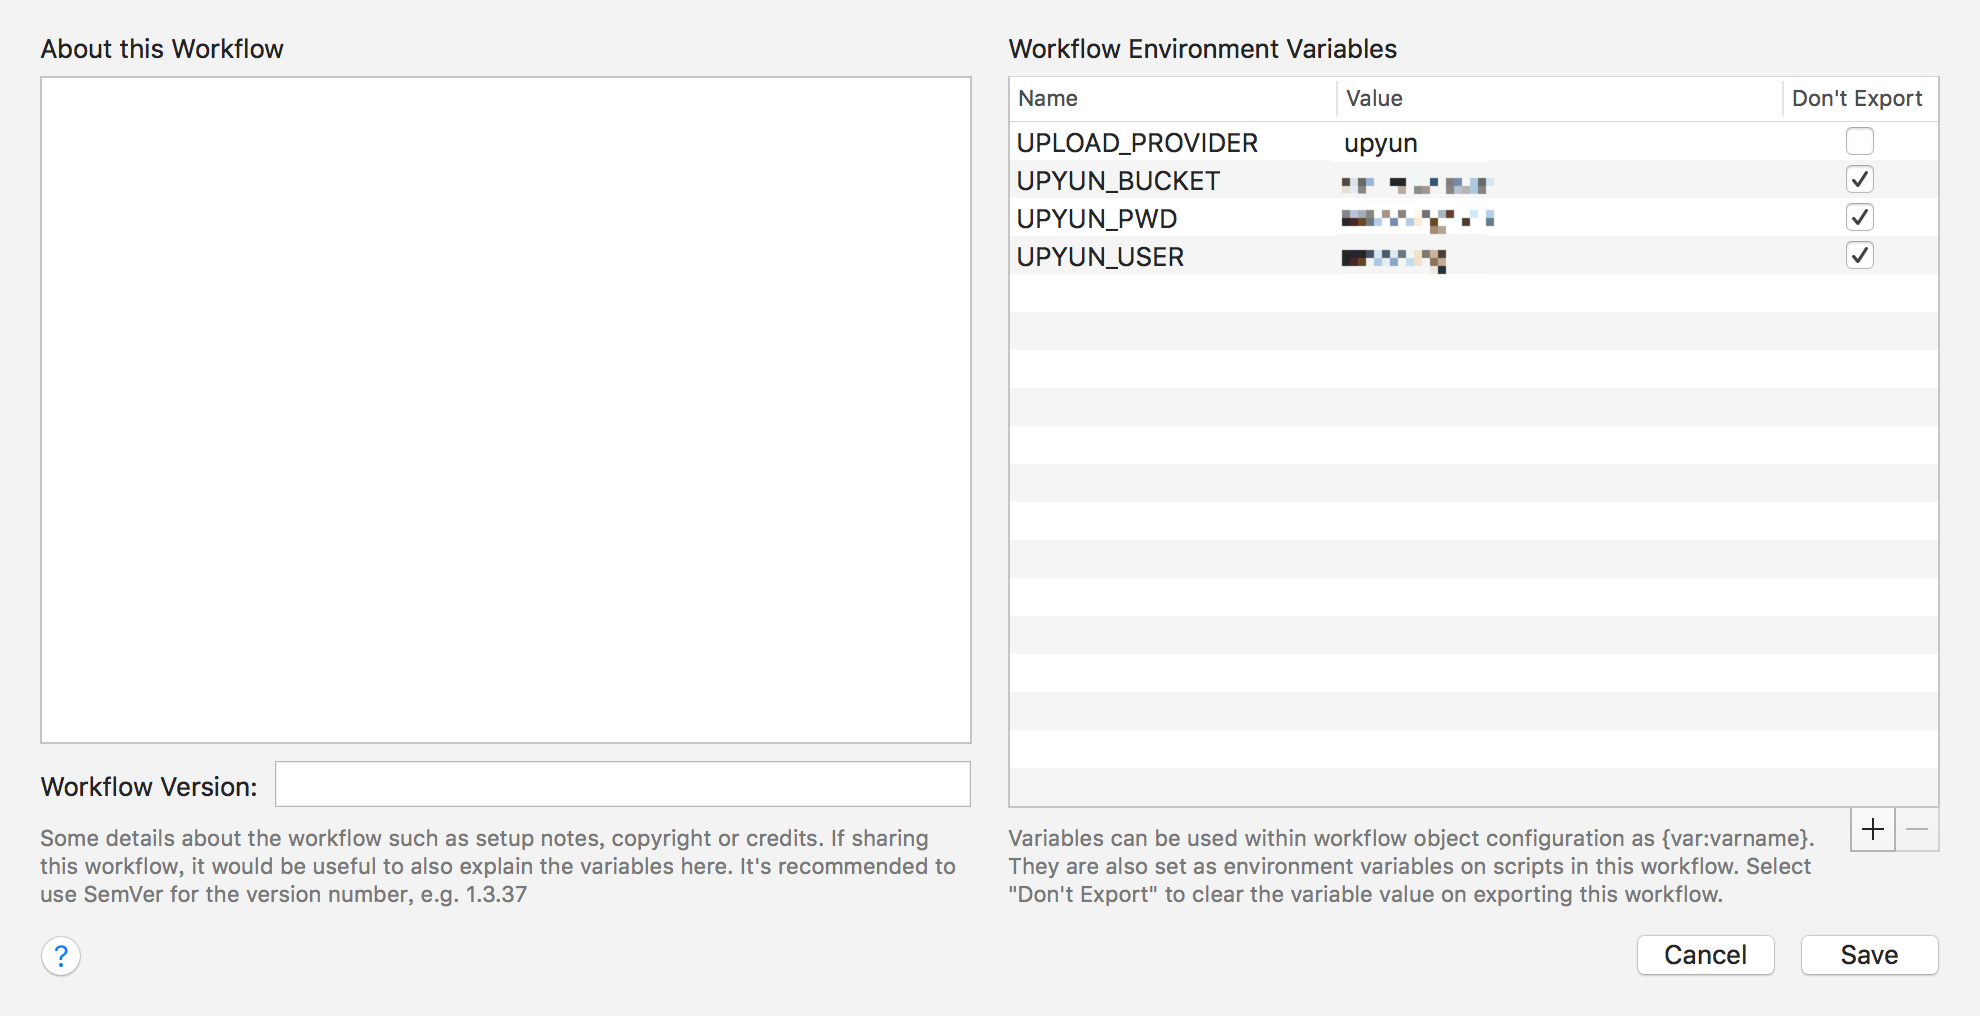
Variables
UPLOAD_PROVIDER- Required
- The cloud storage provider, such as: S3, Upyun, Qiniu...
- Just support
upyunnow, all provider name shoud be lower case
UPLOAD_HISTORY_COUNT- Optional, Default is
50 - The maximum number of records to save
- Optional, Default is
- The provider specific variables
UPYUN_BUCKET- Required
- The service name created at Upyun Console
UPYUN_USER- Required
- The operator name
- Make sure you have granted the operator reading and writing
UPYUN_PWD- Required
- The operator password
- Be careful, it saved as plain
UPYUN_USE_STREAM- Optional, Default is
false - Whether enable stream mode
- Upload with stream mode will save memory
- Optional, Default is
UPYUN_USE_RAW_FILENAME- Optional, Default is
fasle - Whether use the original filename
- The image uploaded will be given a random numeric filename, looks like 147963249017197318.png.
- If
true, the image upload with the original filename, but some special chars (space and ?#%:) will replace with "_"
- Optional, Default is
UPYUN_BASEURL- Optinal, Default is
http://{UPYUN_BUCKET}.b0.upaiyun.com - The base url of the access url
- You can change to the domain of yourself, only when you have config the CNAME redirector
- Optinal, Default is
Attention: Don't export your secret variables, unless you want to share your storage.
Usage
Everything is ready. Let's upload.
Upload
There are three ways to upload:
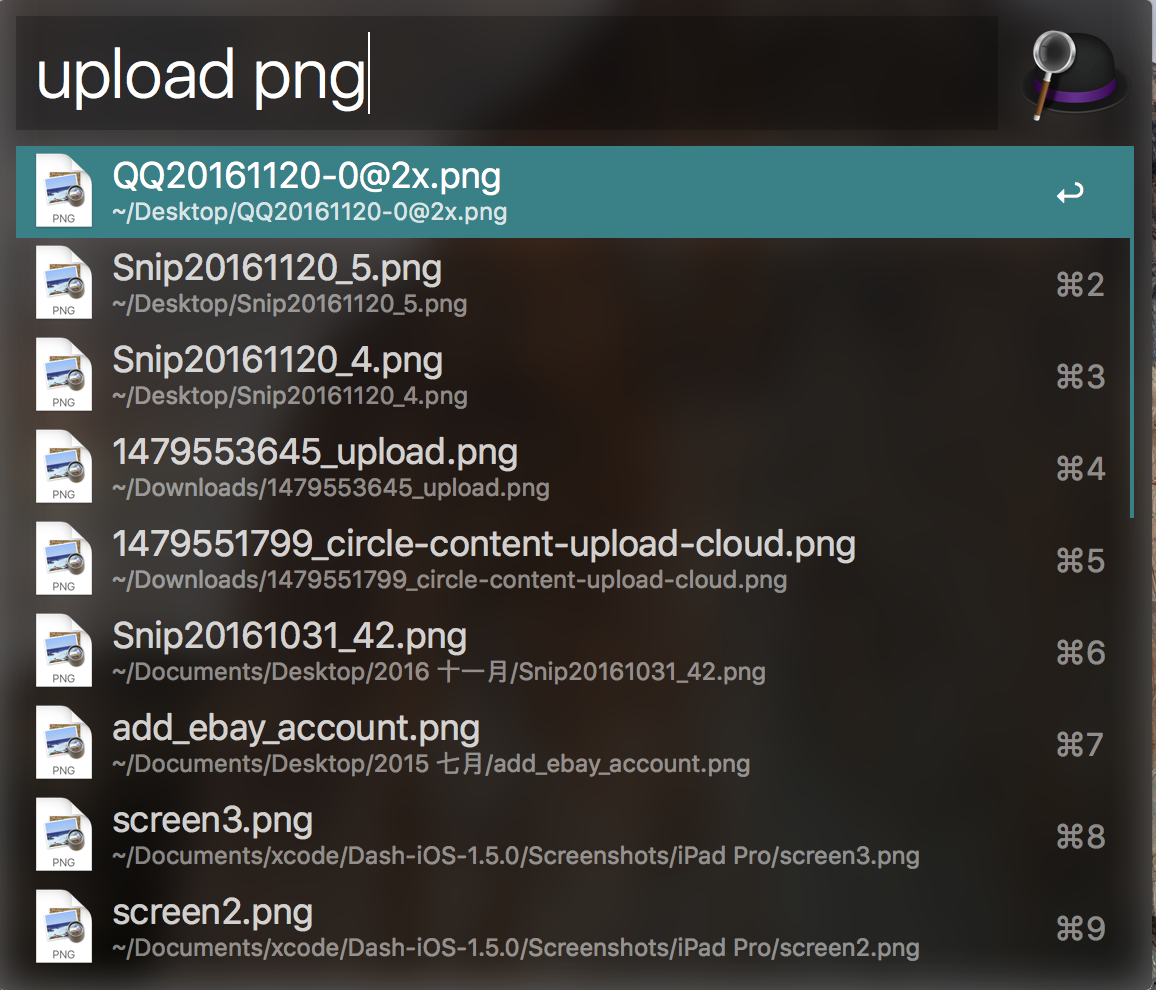
-
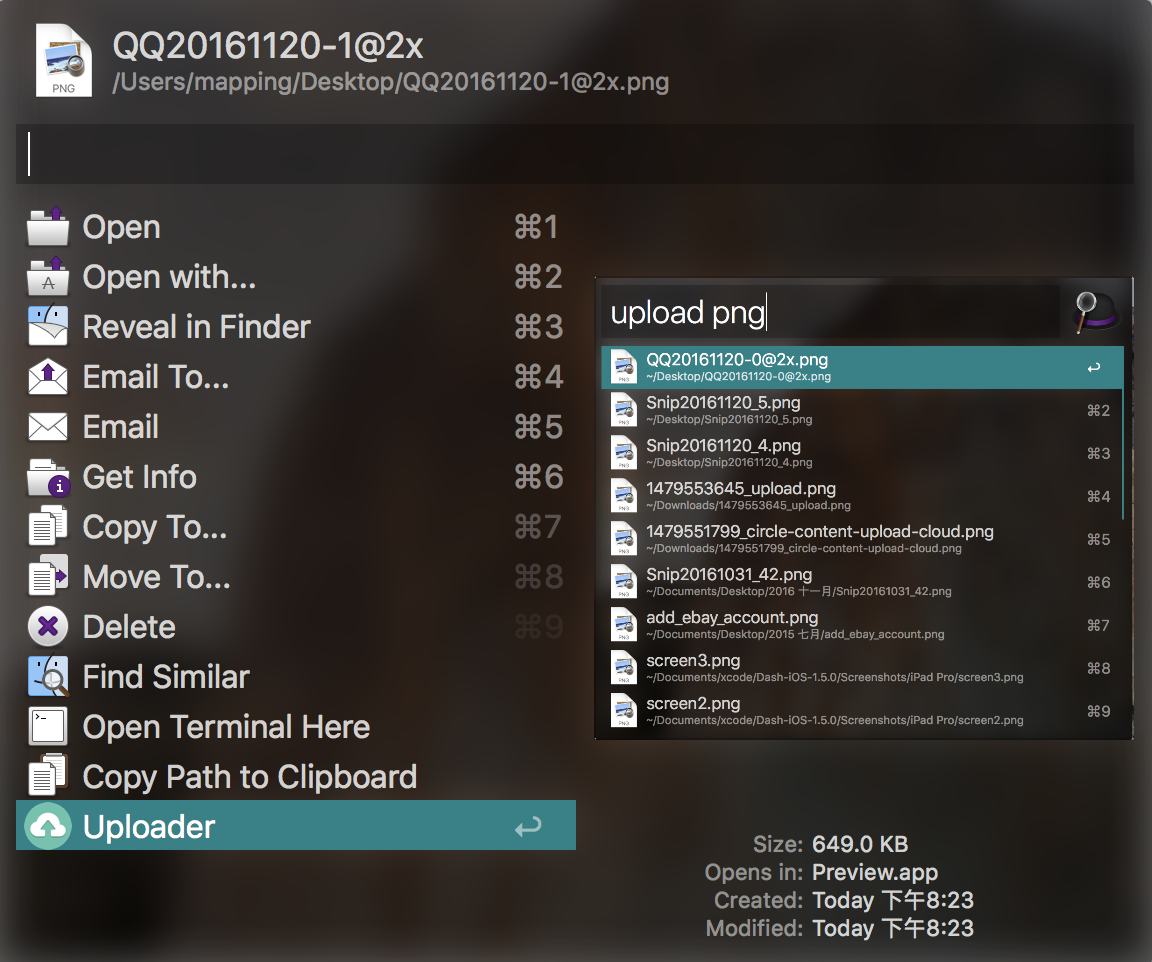
Input "upload" keyword, pick a file. You can also filter the files with query.
-
locate a file in Alfred, select "Uploader" operation
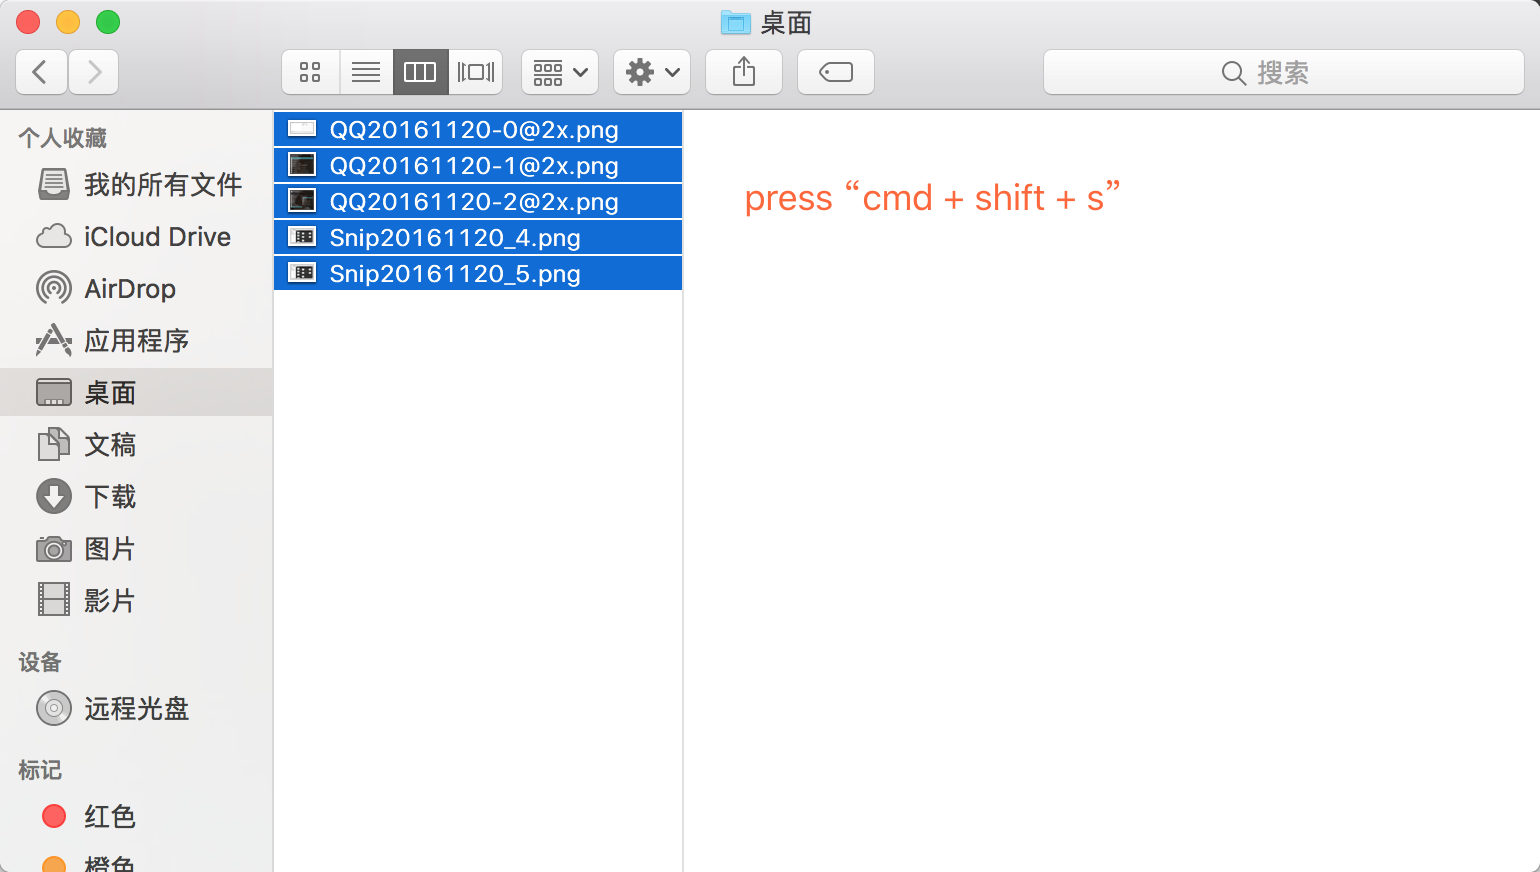
-
select files in Finder, press hotkey "cmd+shift+s". I highly recommend this way, because it support multi files once.
Once you receive a notification said "😀Image upload success", it means the local image has been uploaded to remote, and the access url is ready in your clipboard, you can paste it directly.
Tips: The first way, if you select a file with "alt (option)" key pressing, the result url will wrap a markdown img tag ()
Uploaded
Use "uploaded" keyword to lookup the uploaded images, keeping 50 records by default, query filter alse support.
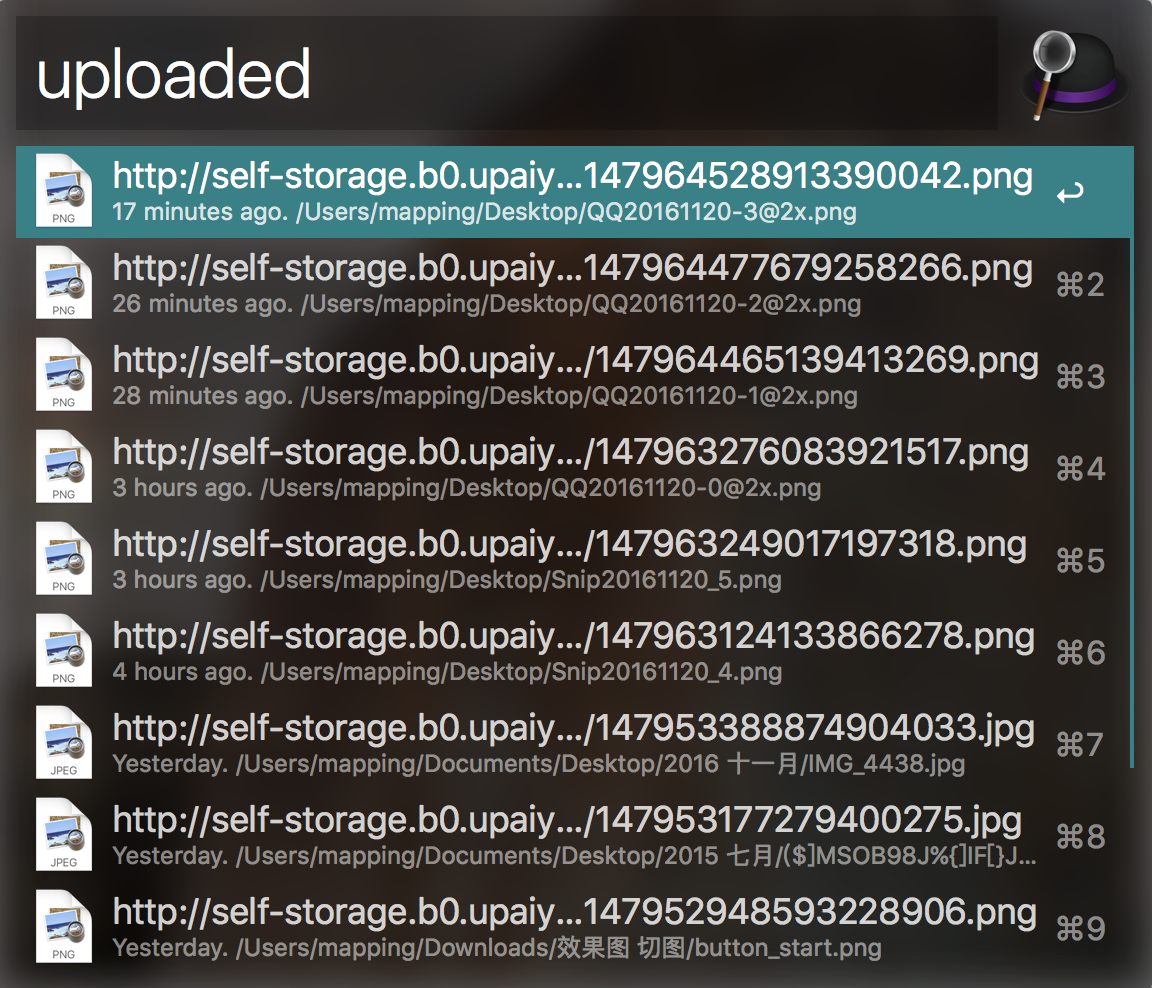
As shown above, you can see the access url, the original file path and the upload time. Once you select a image, the access url copied, then paste it to anywhere you want. From last tips learned, the "alt" key also works here.
Contribute
Send me a pull request, or commit an issue.